Whenever I begin designing a new animal, whenever I make an animal that I have made many time before, I use this method to start off my amigurumi plushies.
I have heard of several people using the 'chain 2, sc X about of stitches into the second chain from your hook' because they can't really get the magic ring right. The 'chain 2' method is good if you are just learning how to make amigurumi, and you are just doing a small practice circle, but I don't recommend using it for a stuffed animal. Why? Because once you work the required amount of stitches into the specified chain stitch, you have to pull the beginning yarn strand tight to close the hole. But when you use the 'chain 2' method, the hole doesn't close all the way, leaving a hole in your stuffed cutie :(
The magic ring method solves that problem. When you are making the magic ring, you are basically making a knot.
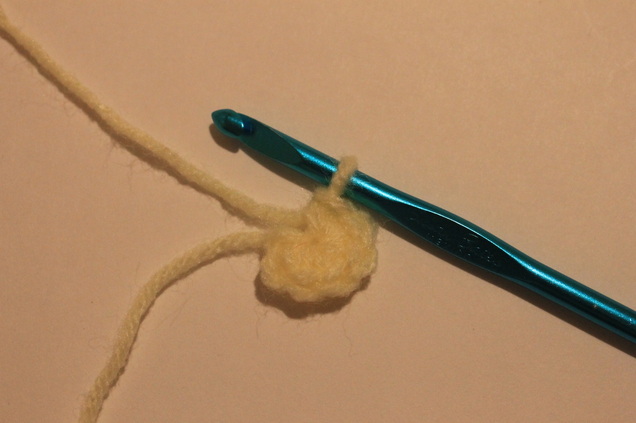
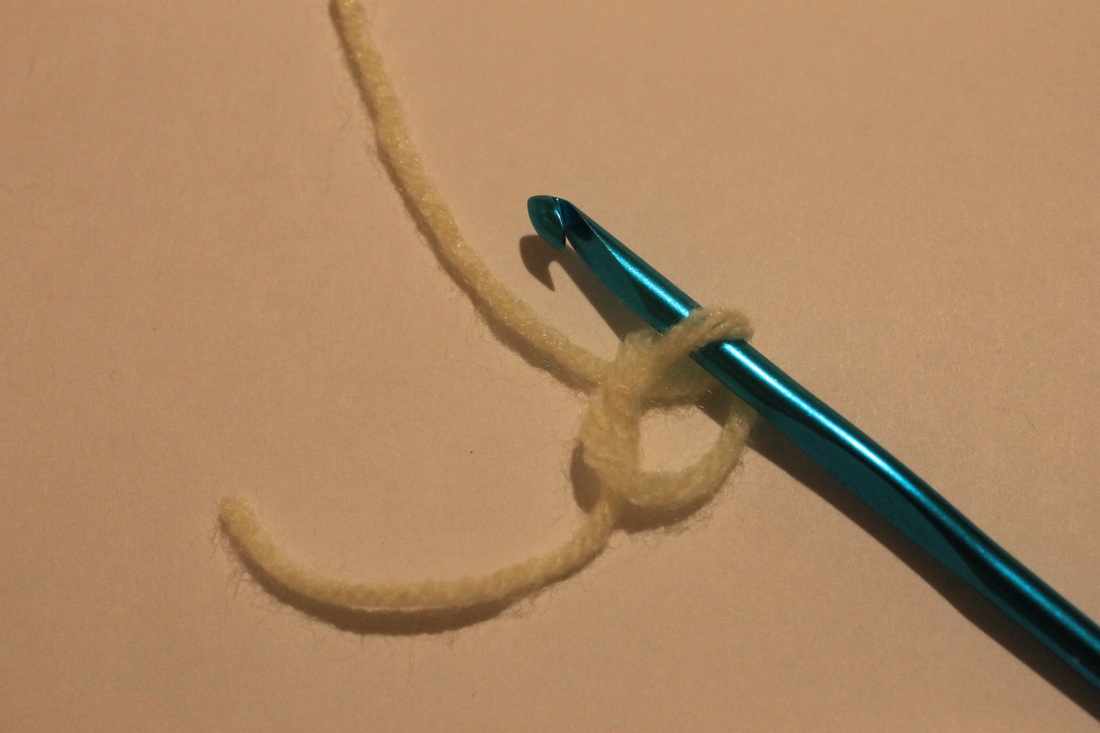 | ← Take a look at this photo. If you were to cut the working yarn and pull it through the loop, after pulling the two yarn strands tightly together, you would have nothing but a tight knot. So would you rather have a hole in your amigurumi, or a nicely closed beginning ring? If you prefer the latter, keep reading! |
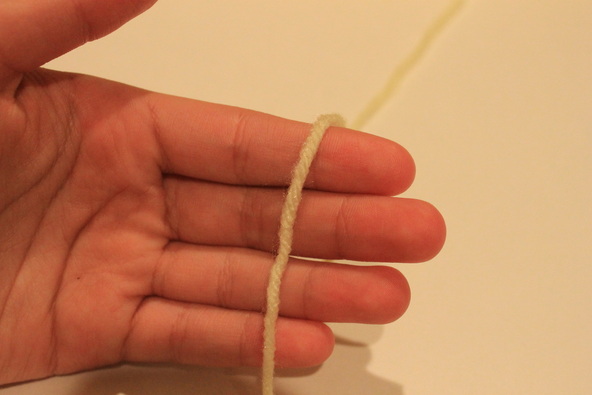
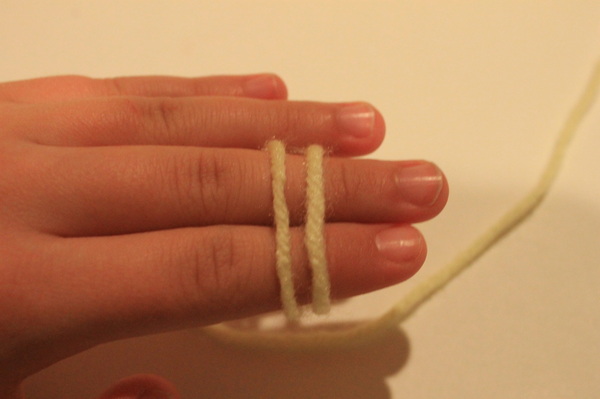
Here is how to begin. Place the working yarn over you hand (I am right handed, so I am putting the yarn over my left hand. If you are left handed, loop the yarn over your right hand).
Then, loop the yarn under your index and middle finger (at this point, you can curl in your ring finger and your pinky).
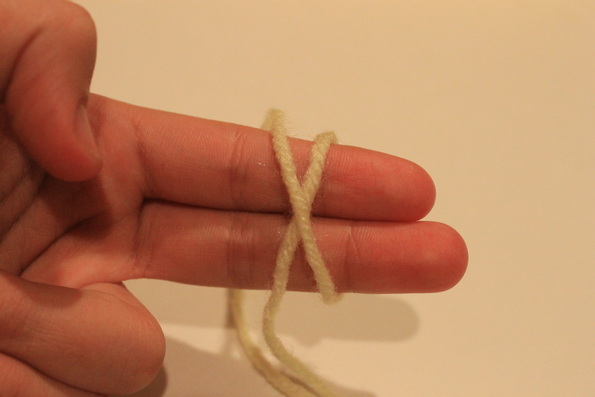
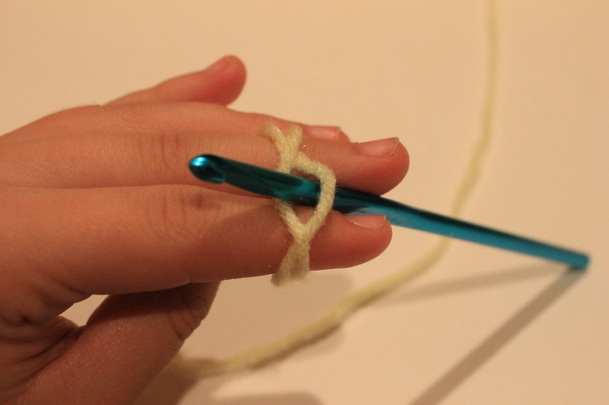
Now, turn your hand so that the yarn looped over your fingers looks like this:
Looking good! Just a few more steps and you can begin crocheting. Now, insert you hook into both loops:

Now, do you see the loop to the left? That's what were focusing on.

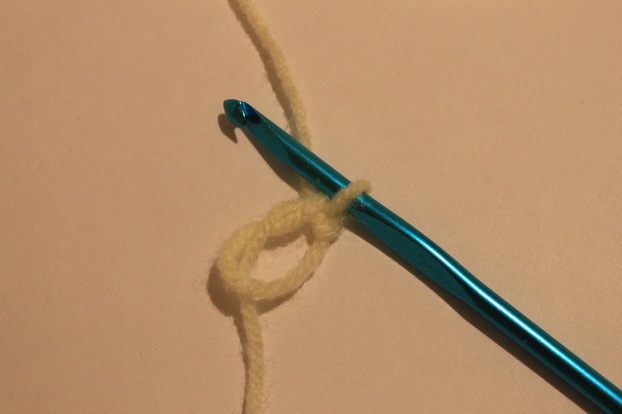
With your crochet hook, pull the left loop through the right loop:
At this point, you can take pull the ring off of you fingers.

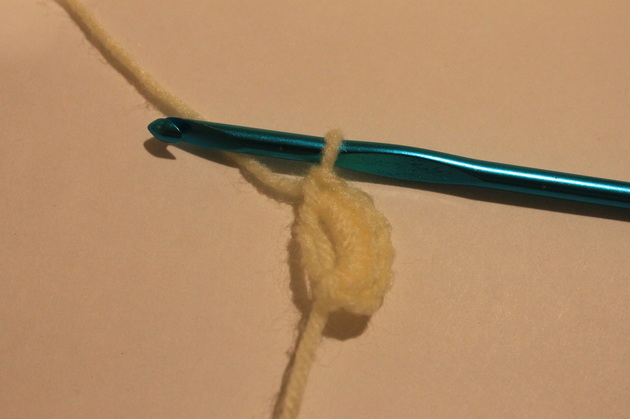
After that, chain 1 (this chain will look kind of strange, not like a normal chain).
Then, insert your hook into the loop, and complete the stitch. Then, crochet the required amount of stitches into the ring.
After that, you can close the ring by pulling the yarn strand tight (Don't be afraid to pull. If you don't pull, you'll have a hole!).
After that, you can begin on your stuffed animal, and you won't have a hole! Be sure to practice this several times before you begin an animal to ensure that you understand the magic ring and how to do it correctly. I hope this tutorial helps you will your future amigurumi plushies!

 RSS Feed